How to Rip QuickTime Video to MP3 Audio File

David James
Updated on Aug 29, 2023
Q: I have some of funny QuickTime clips on my Mac that I would like to strip the sound part from the QuickTime files and save in .mp3 to be able to listen to on my car player. Is there an easy way to rip just the audio?
If you're a music fan, you probably have a collection of concert videos and music albums in your media library. Sometimes, when you came across a favorite video—say a QuickTime movie file, you might want to split the audio from it and save in an audio track file like MP3, AAC, WMA, M4A. This usually involves audio converting process.
There are many roads to take care of task like this, one of the most efficient and reliable tool for accomplish this task is Video Converter. Despite the name, this app is an all round audio converter which can rip audio tracks from QuickTime to MP3 on your Mac and PC's. It doesn't matter what type of video file format you choose to rip from, and what type of audio file format you want to export to.
Besides, the application is capable of converting video files from one format to another, along with integrated device-targeted presets and customizable video settings, making a good balance between regular users and experienced users.
Click the download link above, and choose your desired save location. Then, launch the installer and follow the on-screen instructions to complete the installation. Open the application once installed.
How to convert QuickTime Video into MP3 Audio in Mac (for example)
The application looks to be a simple program, with a clean and easy to use interface, until you see all the complex options hidden away in the file menu.
Stage 1 – Load QuickTime movie files to the application
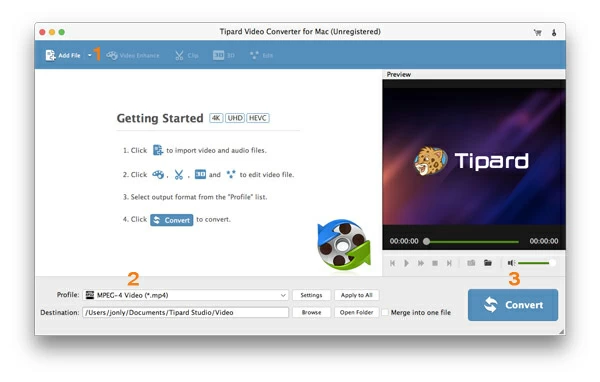
To add your QuickTime files to the program to be converted into MP3 audio, click on the "Add File" button in the upper-left corner of the screen. Locate and select the QT videos and then click Open.
Stage 2 – Select MP3 option from "Profile" menu and configure the output settings if required
Once QuickTime videos selected, you can move on to configure your output options, hit "Profile" box in the bottom left corner of the screen. Select MP3 - MPEG Layer-3 Audio (*.mp3) as the audio output under "General Audio" category. Other audio outputs supported such as .wma, .m4r, .aac, .ogg, .au, .mka.
You can then click "Settings" button next to "Profile" to manually set the MP3 profile parameters, this is optional.
Next, make sure and select a path for the final converted files in "Destination" field.
Aside from extracting audio files from QuickTime to MP3 on Mac and PC's, this QuickTime converter application also allows you to convert any type of videos to other video formats that can be played on the device of your choice.
There are a great selection of video output options and device presets listed in the left pane. The latter is handy if you want to convert the video to play on a device. Once you choose the preset, all related output settings including resolution, codec, bitrate, frame rate will be optimized automatically for the target device.
Stage 3 – Start converting QuickTime to MP3 sound format on a Mac or PC
Now that you have finished configuring everything, just press the blue "Convert" button in the lower right-hand corner of the program's window to start QuickTime to MP3 conversion process.
The amount of time it takes will depend on the size of the QuickTime files in the process list but it will take a while no matter what. Make yourself a cup of tea.
That's it! After your QuickTime videos are converted to MP3 files on Mac and Windows, you're ready to copy those audio files to your car player or audio device and enjoy on the go!
Enjoy!
About David James
 Video ConverterConvert files from one format to another
 iPhone Data RecoveryRecover deleted files from iPhone, iPad
 Blu-ray CreatorBurn video & audio files to Blu-ray
 Blu-ray PlayerPlay Blu-ray, DVD, and movie files easily
 Blu-ray RipperRip Blu-rays/ DVDs to digital files
 Blu-ray CopyCopy Blu-rays/ DVDs to another disc