How to Convert QuickTime File to WMV Video

David James
Updated on Aug 29, 2023
"Error: invalid file format..." We've all been there at some point. You're opening a QuickTime video in a WMV player or Windows app, only get the error message that the video type is not in the supported lists. But before you throw the video away from you, there are ways that you can use to make the QuickTime video playable.
It's no doubt that you are able to work QuickTime movie files anywhere on Mac platform, ranging from QuickTime Player, to iPhone, iPad, Apple TV, to iMovie, Final Cut Pro, and more. However, despite QuickTime's functionality in Mac environment, it's not the most compatible format when it comes to playing said QuickTime video content across platform, devices. In this article, we're going to discussion how to convert QuickTime video to WMV format in Mac OS X or Windows — another multimedia container format fit for many occasions.
QuickTime to WMV converter
If you're looking for a program that can convert QuickTime file to WMV in a fast way, you can't beat Video Converter for Mac's ease of use. Even if you've never used video converting utility before, you'll have an easy time converting your QuickTime movies and other digital videos into whatever format you need. It at the same offers you plenty of device presets, as well as advanced conversion options and deeper tweaks if you prefer those.
For those who want to convert QuickTime movie files to WMV on a Windows machine, please refer to its equivalent — Video Converter for Windows.
Here's our quick guide on how to convert QuickTime to WMV video files on Mac for example. Click the link above to download the tool on your computer, follow the wizard's on-screen prompts to finish installation task.
Mac OS X: QuickTime to WMV Workflow
Find More: How to Burn QuickTime Movie Files onto Blu-ray Disc.
Stage 1
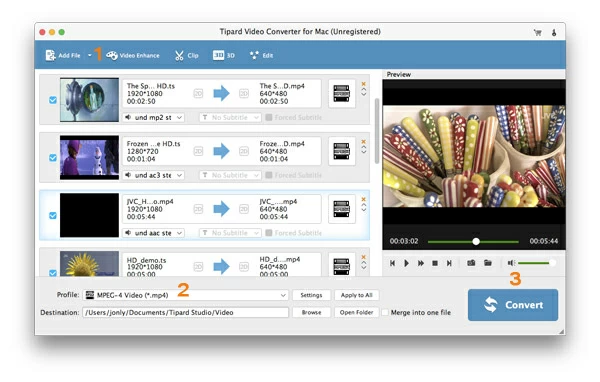
Either drag and drop a QuickTime video into the program window or click on the "Add File" button at the top menu and select the file that you want to convert from your computer hard drive.
You video will appear in the left section, as shown in the picture below.

Stage 2
The next step you'll want to take is to choose WMV option as exporting file type from "Profile" drop-down list and define paths for converted files in "Destination" field.
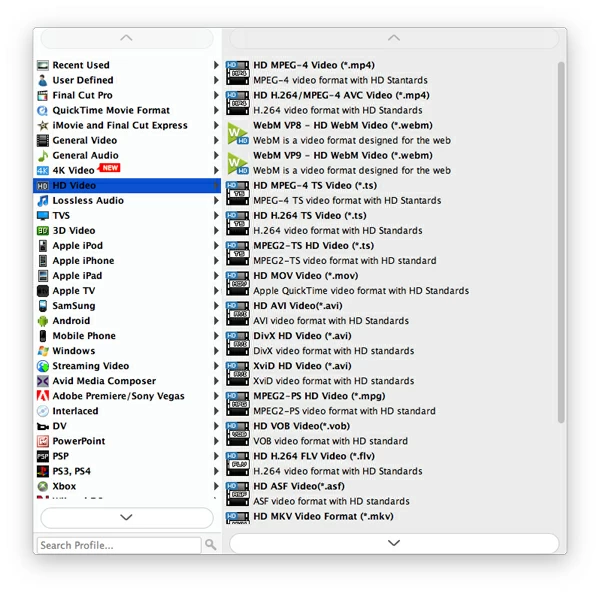
To choose your output WMV format, hit the "Profile" menu at the lower left side of the window to get into the format-selecting panel.
Scroll down the list on the left hand and find "HD Video" category, in its expanding pane at the right hand, pick "HD WMV Video (*.wmv)".

One important property of this QuickTime to WMV converter for Mac is it provides you with deep tweaks for videos. If you're experienced user, however, you can just click the "Settings" button at the bottom center of the window and get a group of conversion settings to take more control over the video such as resolution, bitrate, codec, frame rate, aspect ratio.
But please note that changing the default value of settings is not advisable if you are a novice.

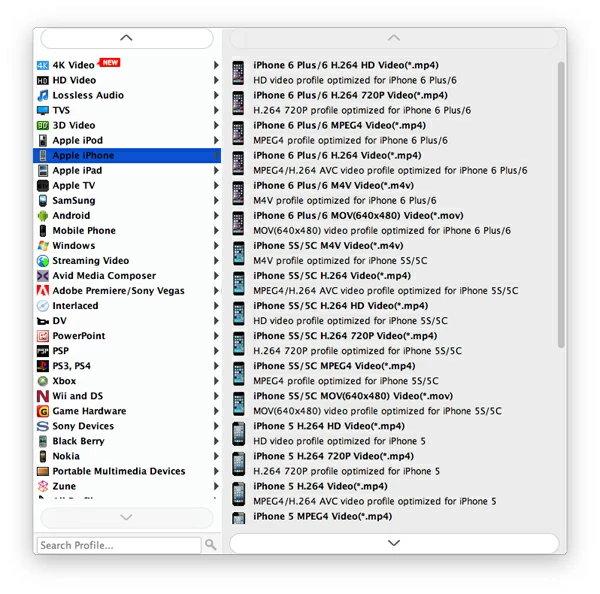
If you have a portable device in hand, the chance is that you sometimes want to convert the video to be suitable for the device screen. But many of users don't know what the exact settings (resolution, size, quality, codec, fps, etc.) of the video should be. The converter understand it and offers several pre-configured device presets available on the list.
Once you choose one of these, it will adjust the settings automatically to fit whatever you choose.

Stage 3
When everything is configured, you can pretty much press the button marked "Convert" at the lower right corner of the main screen and get going.
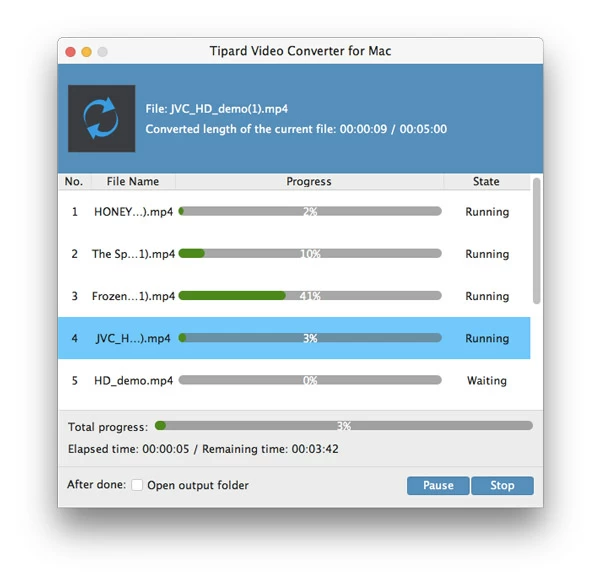
While your QuickTime video is being converted to WMV format on Mac, you can monitor the conversion process via progress bars in the new pop-up window.
The conversion process can take quite a while, the times vary depending on how long your QuickTime video files is (size), the speed of your machine (hardware), converting settings (bitrate, codec, etc.) and other factors. It's advisable to let the software do the work by itself and sit back and relax.

That's it! You have made your QuickTime movie files converted to WMV on Mac OS X. The guide also applies for Windows platform.
Enjoy it!


About David James
 Video ConverterConvert files from one format to another
 iPhone Data RecoveryRecover deleted files from iPhone, iPad
 Blu-ray CreatorBurn video & audio files to Blu-ray
 Blu-ray PlayerPlay Blu-ray, DVD, and movie files easily
 Blu-ray RipperRip Blu-rays/ DVDs to digital files
 Blu-ray CopyCopy Blu-rays/ DVDs to another disc


