How to Convert WMV Video to Play onto iPad

David James
Updated on Aug 29, 2023
Now you may jump from a home theater personal computer (HTPC) to a iPad (or Android tablet) for streaming movies and TV shows online today via Netflix, iTunes, etc. If your rely entirely on content from those video-streaming services, you most probably don't have any issue working with iPad tablet. However, if you have some of Windows media videos that are in .wmv format on your local hard drive, you might be wondering if there was a way to copy those WMV to play on Apple iPad?
The fact is that Apple iPad doesn't play WMV by default. It has a limited support of file formats, making quick efficient no-fuss WMV conversions a necessary at times. This is why video converting tool should be included in your shortlist of apps.
WMV to iPad converter software
There are countless apps on the web to convert WMV to an iPad acceptable file on Mac, but Video Converter for Mac stands out from the crowd. It's a feature-rich & dead simple video conversion program that allows you to convert movie files into a wide variety of video & audio formats you want. You can select preset profiles from it for popular device playback, and spend a while tweaking conversion settings in detail. Beyond converting, the tool is also capable of making basic editing on the file, which is very useful to enhance the look of your video.
Converting WMV videos to iPad format on a Windows machine is also available by sticking with the app's PC equivalent – Video Converter for Windows. Download link below.
The guide works largely the same in both Mac and Windows, the only difference being the look of the interface. To convert a WMV to view on iPad, follow this process:
How to convert WMV to Play on iPad
Related Article: How to Play MKV File on a Mac.
Stage 1 – Launch the app and add WMV files into its window
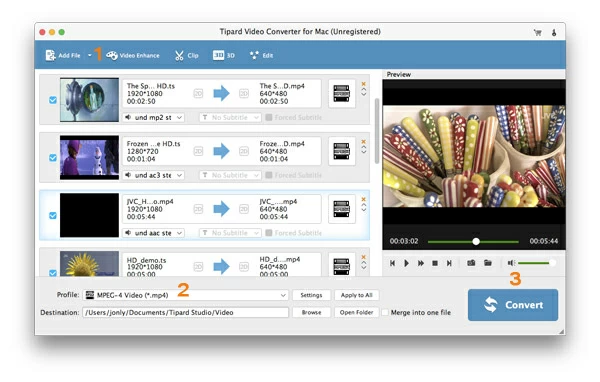
At the first glance you open up the app, you'll be greeted with a clean interface. It's simple to understand and get working in immediately—even video newbies will have an easy time using this software.

Once you launch the app you will need to open your WMV source files. You can either load up WMV files using the "Add File" button in the top menu or simply drag any WMV video on your computer and drop onto the program window.

Stage 2 – Select the iPad-targeted preset
After you have imported WMV files onto the program, you are ready to select the output format.
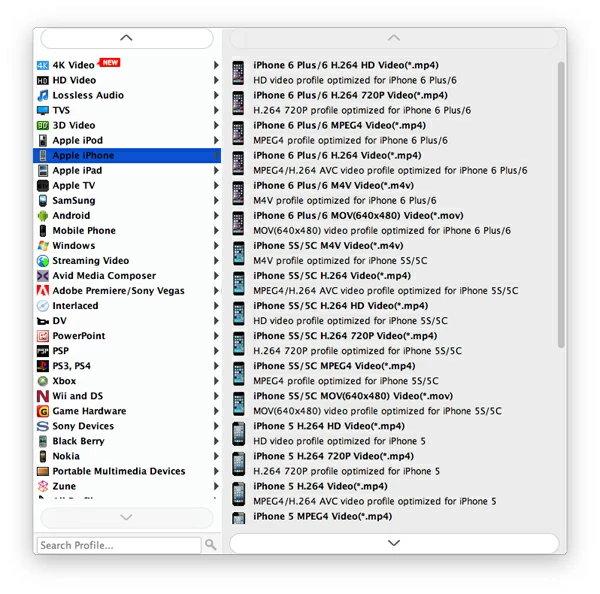
The WMV converter for Mac ships with different preset profiles based on the type of popular devices such as iPad, iPhone, Galaxy S7, Apple TV, Android tablets, phones, PS4, and Blackberry, which makes it convenient for you to convert video to play on that device, without fiddling with any settings. Just choose your model of device, and the software will ensure the file will play well on that device.
In this example, to play WMV onto iPad, simply head to "Profile" drop-down menu at the lower left corner of the screen, highlight "Apple iPad" column, and select your iPad model, iPad Air 2 H.264 HD Video (*.mp4) for example, and you should now be good to go.

Use format instead
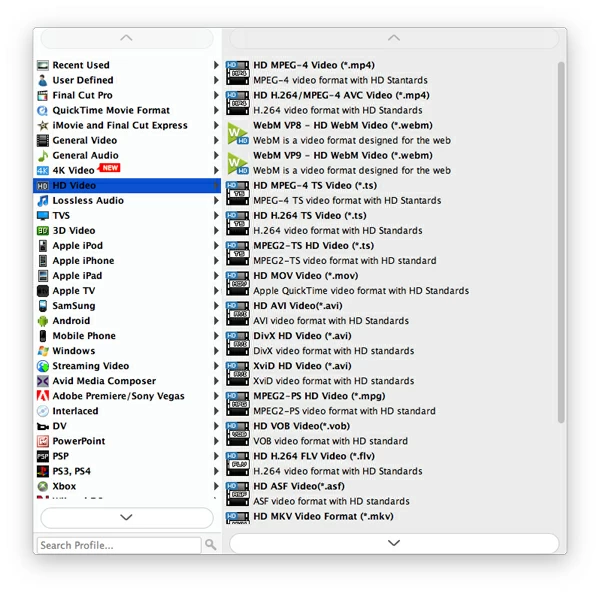
Alternatively, if you don't want to go with the built-in presets, the software lets you select a common format, and customize the conversion settings if required.
For example, you can select HD H.264/MPEG-4 AVC Video (*.mp4) or HD MOV Video (*.mov) from "HD Video" column.

If you like and know what you're doing, click the button marked "Settings" next to "Profile" at the bottom center of the interface to adjust the final quality of your movie. You can modify how video files are encoded (codec) as well as the bit rate (kbps), number of frames per second (fps) and aspect ratio (4:3, 16:9) for video files.

Click the OK button to save the changes you made.
Stage 3 – Start converting WMV!
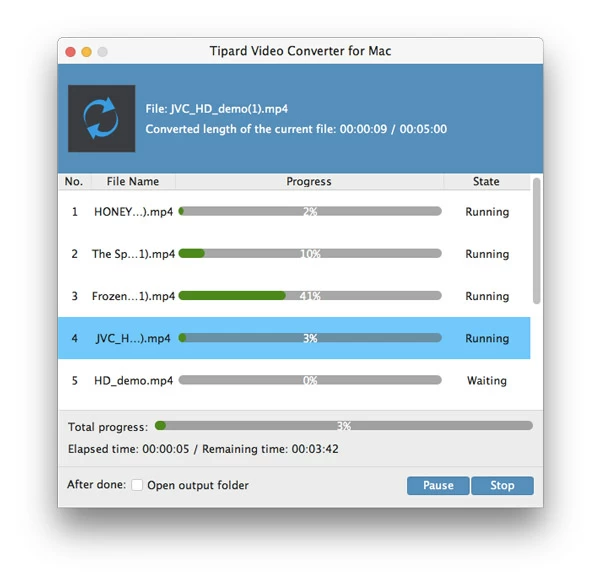
When everything is configured the way you want, press the blue "Convert" button at the lower right-hand side of the program window, the WMV to iPad file conversion on Mac OS X will begin. You can track the progress though the window as picture shown below.
Understand also, converting WMV to iPad video on Mac can take some time to complete, depending on many of factors: how many WMV files are in the list, your computer hardware, output settings you configured, and others.
Be patient.

Stage 4 – Sync the converted files to your iPad
After the WMV conversion finishes, move the converted files into your Movies collection in iTunes. You're ready to connect your iPad to iTunes and sync the movies to your iPad.
Have a good watching time!


About David James
 Video ConverterConvert files from one format to another
 iPhone Data RecoveryRecover deleted files from iPhone, iPad
 Blu-ray CreatorBurn video & audio files to Blu-ray
 Blu-ray PlayerPlay Blu-ray, DVD, and movie files easily
 Blu-ray RipperRip Blu-rays/ DVDs to digital files
 Blu-ray CopyCopy Blu-rays/ DVDs to another disc


