How to Use Video Converter

David James
Updated on Aug 29, 2023
Video Converter for Windows [Download] is a powerful video converter that lets you to convert all video and audio files to required formats including WMV, MP4, FLV ,MOV, AVI, MPEG, VOB, MKV, QuickTime, 3GP, TS, MP3, AAC, WMA. etc. The following will show you a step-by-step guide to complete conversion tasks.
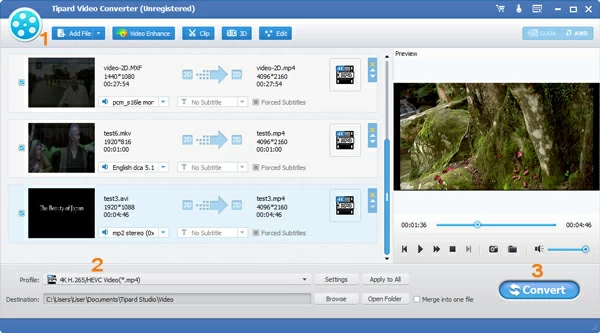
Click on the "Add File" icon on the top bar of the software, or directly drag and drop videos to the program. You then are able to preview the original video on the preview window, and take a snapshot of the video and save picture to your local image library.
Note: this program provides you with the ability to combine multiple video files into a big one by check "Merge into one file" option at the lower right side (next to "Convert" button).
STEP 2
Select output formats
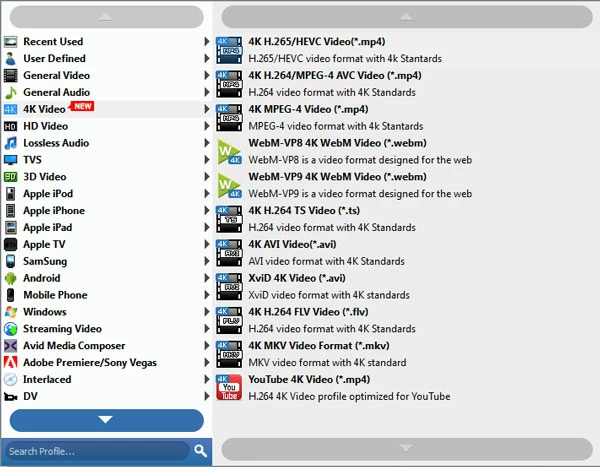
Open "Profile" drop-down menu on the bottom left of screen to enter Profile list, and you will see lots of video and audio format that are compatible with different device, program and software. Pick up the one you want and confirm it.
Note: If you want all your imported files with the same setting, check "Apply to all".
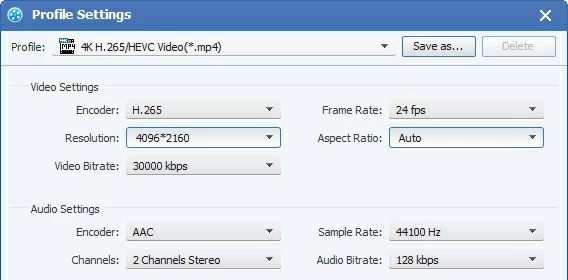
For an advanced user, you can click the "Settings" button next to "Profile" menu to full control over the settings of output file, including quality, encoder, resolution, bit rate, frame rate, sample rate.
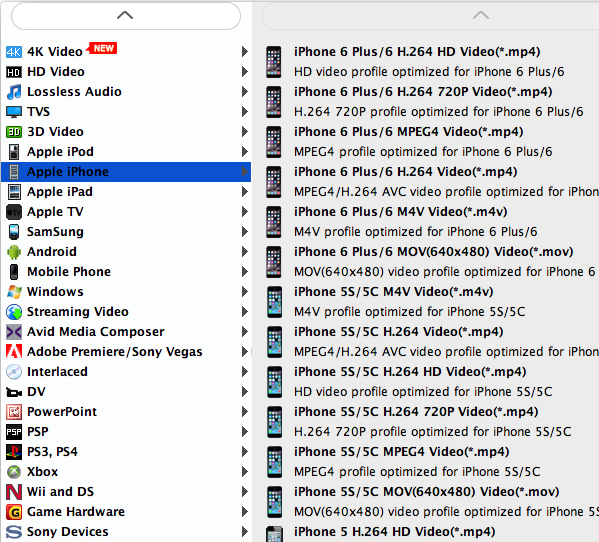
To simplify the process of choosing a specific format and its output settings, the software includes a group of built-in device presets listed on left for conversion purposes, including a bunch for popular devices such as Apple iOS players, android phones, game consoles,etc.
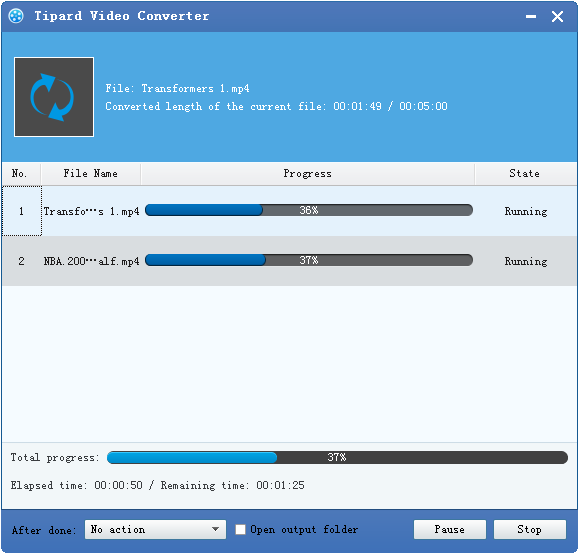
STEP 3
Start converting the video
After everything is set properly, click on the big Convert button on the lower right side of main interface to start the conversion.
After the conversion, simply open the Destination folder where your output files are saved.
Edit video file prior to conversion (optional)
By clicking on the "Edit" icon (or "Video Enhance" icon) on the top menu of main screen, and you can get into video editing window. A real-time video preview is available while editing video.
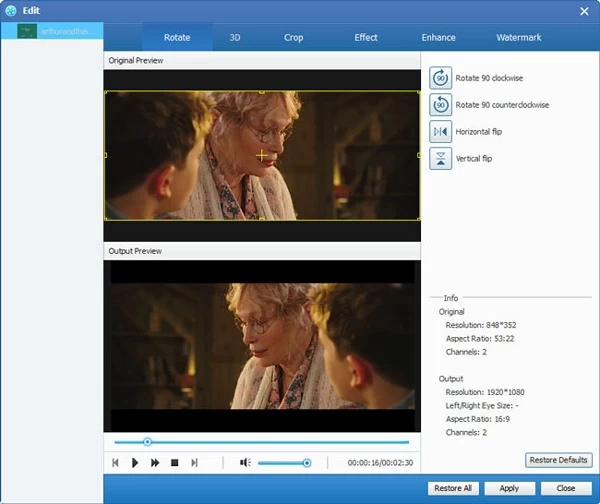
Rotate video direction
Choose the file you want to rotate, select "Rotate" column to rotate your video.
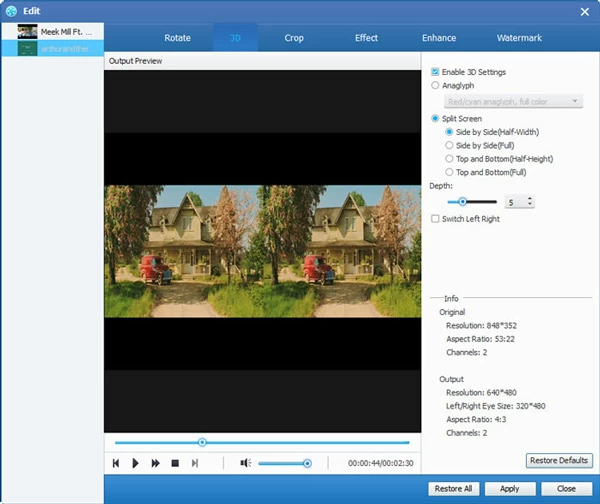
Convert to 3D
Click on the "3D Settings" icon on the top bar of the program and you will enter the 3D setting section. According to the 3D glasses you are using to enjoy 3D videos, pick one of the 3D setting modes from Red/Cyan, Red/Green, Red/Blue, Blue/Yellow, Interleaved, Side by Side.
Crop video size
Directly drag the dot frame to crop video, check "Keep Aspect Ratio" option to adjust the video frame, like Original, Crop area, 16:9, 4:3. And change the zoom mode according to your need, like Letterboxing, Pillarboxing, Windowboxing. Press "Apply" to confirm it.
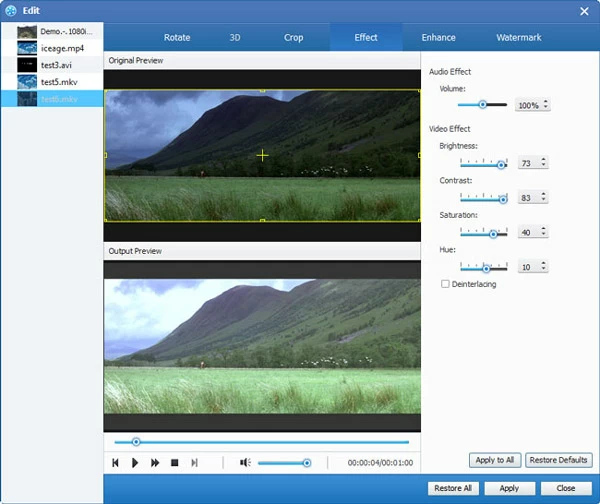
Adjust video effect
Directly drag the slides of "Brightness", "Contrast", "Saturation", and "Volume" for special video effect. Check "Apply to all" to apply the effect settings to any of your loaded files. Press "Apply" to store your work.
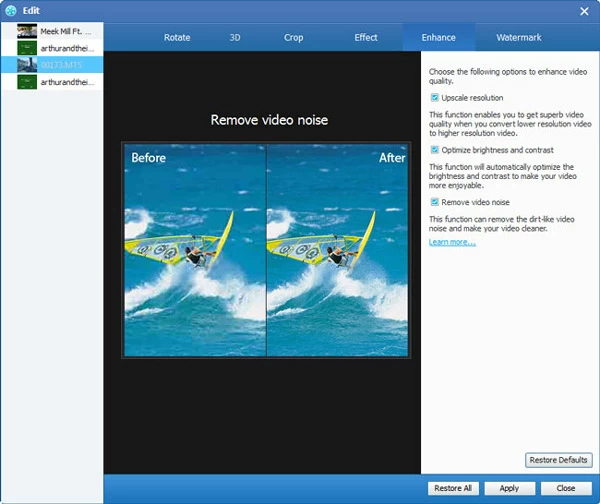
Enhance
Switch to "Enhance" tab, click the options to enhance your video quality.
Add watermark
Check "Enable Watermark", and then add Image Watermark or Text Watermark to the video as you like. Watermark Transparency, Left Margin, Top Margin, Image Size are adjustable.
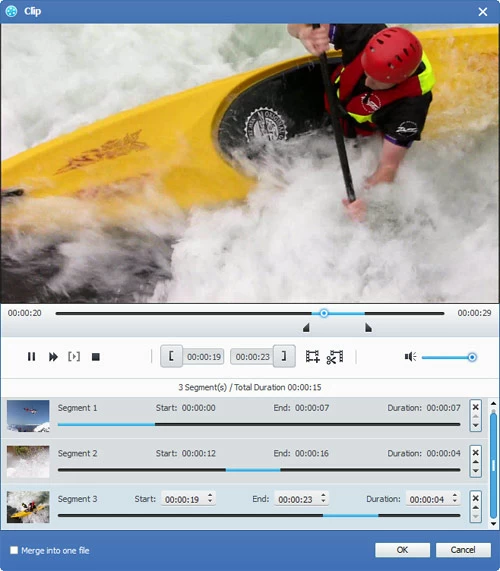
Trim video length
Click this independent option "Clip" on the menu bar of interface to enter the editing window. Drag the slide button to trim video, or modify values in "Start Time" and "End Time", the total Clip Length will be shown. Reset it or click "OK" to confirm it.
About David James
 Video ConverterConvert files from one format to another
 iPhone Data RecoveryRecover deleted files from iPhone, iPad
 Blu-ray CreatorBurn video & audio files to Blu-ray
 Blu-ray PlayerPlay Blu-ray, DVD, and movie files easily
 Blu-ray RipperRip Blu-rays/ DVDs to digital files
 Blu-ray CopyCopy Blu-rays/ DVDs to another disc